Speed Ramp Transition Prompt
Move between two shots with a controlled speed ramp instead of a plain cut or a generic dissolve.
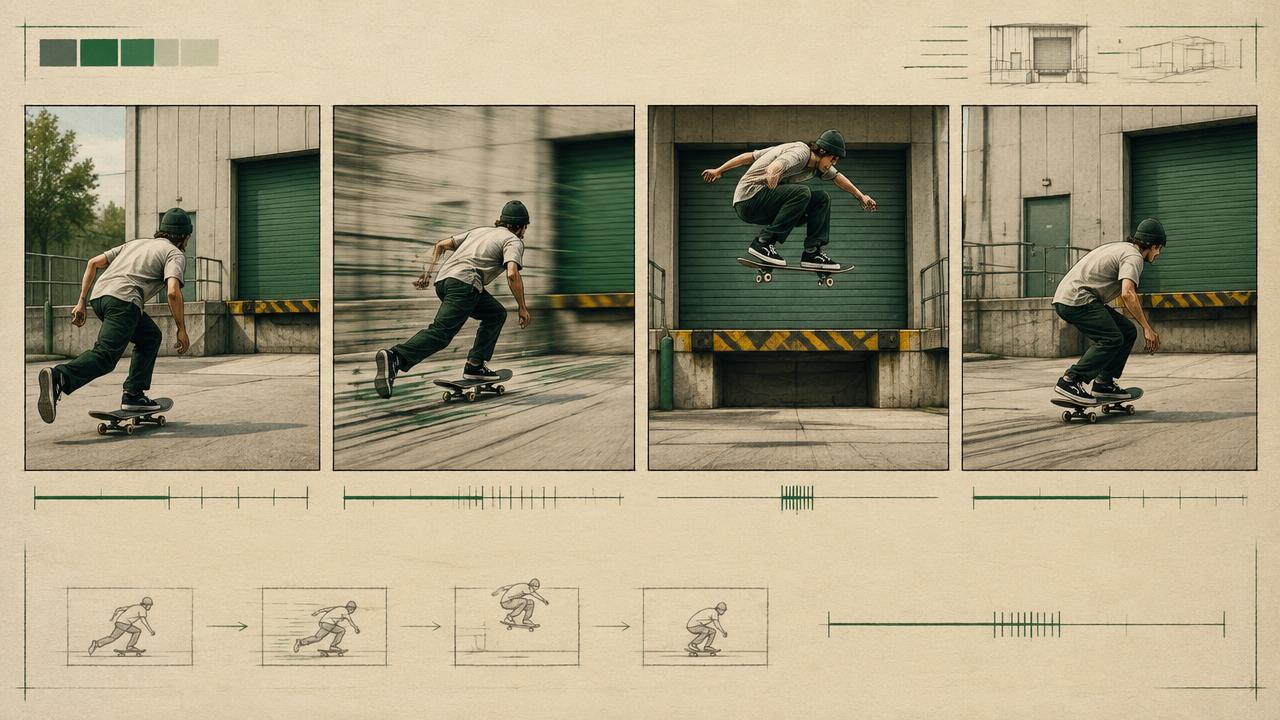
Designs a speed-ramp transition for AI video, defining the ramp point, in and out speeds, the matched visual element that carries across the cut and the motion blur profile through the ramp.
Ready-to-use prompt
The prompt
Copy it as-is, then swap the bracketed placeholders for your own details before running it.
Role: You are an editor designing speed-ramp transitions for AI-generated footage.

Context:
- Shot A: {{shot_a}}
- Shot B: {{shot_b}}
- Total length: {{duration_seconds}} seconds
- Energy: {{energy}} (building, releasing, punchy)

Task: Design the transition, specifying:
1. Ramp point timecode and the visual event that hides it, such as a foreground wipe, fast turn or peak of subject motion.
2. Speed before the ramp, acceleration interval and speed after it. Treat percentages and frame counts as an editing plan and visual cue, not a guarantee that the model performs exact time remapping.
3. The matched element that carries across: shape, colour block, subject position or motion direction.
4. Motion-blur profile through the ramp, including direction and when detail becomes sharp again.
5. Camera behaviour on each side, with matching focal-length intent, height and direction of travel.
6. Sound-design cue at the ramp point and the frame where it lands.
7. A fallback edit plan using two clean clips if the generated in-camera ramp warps the subject.

Rules:
- Use one ramp per transition. Multiple speed changes make timing and anatomy unstable.
- The matched element must occupy a similar frame position on both sides.
- Keep direction of travel consistent through the ramp.
- Do not combine a speed ramp with several new camera moves; preserve one readable motion vector.
- Give each source shot enough settled material before and after the transition for editorial trimming.

Output: a two-shot breakdown table, a one-line prompt for each shot, and a FALLBACK EDIT note with the intended ramp timing.
Estimated results
Editor's note
Why this prompt matters
A useful speed ramp is not simply footage played fast. It is a match cut whose acceleration directs attention away from the seam and into the next image. If direction, scale and frame position do not agree, extra blur only makes the transition look accidental. Generated clips add another risk: asking a model to change scene, camera and speed at once can warp the subject exactly where the edit needs a clean match.
The reliable workflow is to design the two boundary frames first, generate each side with one readable motion vector, and treat the requested ramp timing as an editorial blueprint. If the model produces a convincing transition in-camera, keep it. If not, the clean handles and shared visual anchor let you build the ramp precisely in post without discarding either shot.
Anatomy
Prompt engineering breakdown
Role
Specialist video direction role priming
Context
Move between two shots with a controlled speed ramp instead of a plain cut or a generic dissolve.
Goal
Design a speed-ramp transition between two AI video shots.
Constraints
Explicit numeric and directional constraints replace subjective adjectives.
Output format
two-shot breakdown table plus per-shot prompts
Why this structure works
Specifying the matched element and its frame position gives both generations a shared anchor. Stating direction of travel prevents the reversal that makes ramps feel like errors. Constraining the ramp to a few frames keeps the blur readable, and separate in and out speeds let the ramp build or release energy on purpose.
What you'll get
Expected output
Shot A 0.0-1.6s | 100 percent speed | skateboarder pushes toward camera left to right | 35mm Ramp 1.6s | accelerate to 400 percent over 4 frames | heavy directional blur left to right Shot B 1.8-4.0s | settle to 100 percent | city street sliding left to right, same direction | 35mm Matched element: horizontal motion direction and the warm orange of the jacket carried into a shopfront awning.
Under the hood
Why this prompt works
The carried element gives the eye something continuous across otherwise unrelated images. Matching screen direction and camera height preserves momentum, while a brief directional blur masks fine differences at the cut. One ramp point creates a clear acceleration arc instead of repeated timing changes the model cannot resolve.
The fallback edit instruction is equally important: current video models do not promise frame-accurate time remapping from percentages or frame counts. Designing two compatible clips protects the concept from that limitation and gives the editor control over curve shape, exact cut frame, audio impact and the return to sharpness.
Model fit
Best AI models for this prompt
Veo
Describe the outgoing motion, transition event and incoming motion in chronological order, using the same screen direction and one shared visual anchor. Veo understands cinematic motion language, but no official control guarantees a four-frame or 400-percent ramp. Ask for a rapid acceleration as a visual cue, keep the scene change simple, and generate extra stable frames on both sides. For a dependable deliverable, use Veo to create matched source clips and perform the exact speed curve in the edit.
Kling
Kling's camera controls can help align pan, tilt, zoom or displacement between the two shots. Use those controls to establish direction and framing, not as a substitute for time remapping. Kling often produces energetic motion, so reduce competing blur and protect the subject silhouette at the transition frame. Generate each side independently when the subject, environment or camera axis changes substantially, then match the peak motion in post.
Runway
Runway works best here as a controlled source-shot generator. Start with reference images that already place the matched element correctly, then prompt only the motion required on each side. Use positive, direct wording and avoid packing the edit decision into a long scene description. Where current camera-direction controls are available, use them to align movement; still create the exact speed ramp in an editor so the timing, blur and sound hit remain frame accurate.
When to use
- For sports, travel, fashion, product reveals and short-form edits where momentum should bridge two scenes.
- When two independently generated clips share a direction, colour or foreground shape.
- When a plain cut feels abrupt but a dissolve would remove energy.
- When you can finish the transition in an editor if the model's internal timing is imprecise.
When not to use
- For calm interviews, dialogue coverage or restrained corporate work.
- Between shots moving in opposite screen directions unless reversal is the deliberate story beat.
- When neither clip has stable frames around the intended edit.
- When the subject's face or hands already distort under fast motion.
Get more from it
Pro tips
- 1
Capture at least half a second of stable material on both sides of the planned ramp.
- 2
Match direction first, then frame position, focal-length intent and colour.
- 3
Use a foreground wipe or peak-motion frame to conceal small generative differences.
- 4
Build the final velocity curve and sound hit in an editor even when the generated preview looks convincing.
Don't ship this
Common mistakes
✗ Treating a prompt percentage as frame-accurate retiming.
Fix — Use it to communicate rhythm, but preserve handles and finish the exact curve in an editor.
✗ Changing scene, subject direction and camera move simultaneously.
Fix — Hold one motion vector and one matched visual element across the transition.
✗ Generating clips with no settled frames.
Fix — Request clean handles before and after the action so the ramp can be trimmed without visible warping.
People also ask
Frequently asked questions
Q.Should the ramp happen in the model or the editor?
Either. Models can render a ramp inside one clip, but editing the ramp between two clean generations gives you frame-accurate control.
Q.How fast should the ramp be?
Four to eight frames. Longer ramps read as slow motion rather than as a transition.
Q.What makes a good matched element?
A strong direction of travel plus a repeated colour or shape in a similar frame position.